Dungeon Maps/Layouts
Crimson has 15 dedicated route geometries and two distinct environments. Choose Ossuary's bone halls and crimson waters or Dragonforge's forge floors and lava. Both destinations use the Crimson route diagrams below and have their own 1,000-monster population, final boss and five simultaneous instance slots. L11 spans three floors; every other Crimson layout uses one. Crimson route diagrams · Ossuary environment gallery · Dragonforge environment gallery.
Crimson Ossuary · Infernal Dragonforge
These route previews show the prepared geometry, not live monster locations. B marks where the boss will appear after the clear requirement. The route does not reveal random loot or guarantee the safest pull.
A dropped map rolls one of these layouts uniformly. Reroll layout chooses one of the other fourteen and always changes the route, while preserving the dungeon, difficulty, rarity, modifiers and locks. A sealed map cannot be rerolled. See the cost and restrictions.
Dedicated Crimson routes — awaiting game release
These fifteen diagrams apply to Crimson Ossuary and Infernal Dragonforge. They are extracted from Crimson's prepared route geometry. S marks the entrance, B the boss location, and matching numbers connect floors. L11 Three Terraces shows all three floors. The other route diagrams on this page belong to the earlier dungeon families.
-
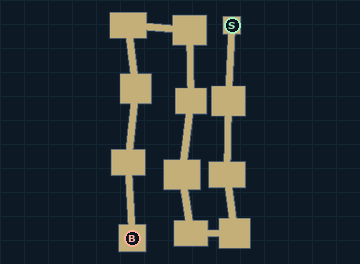
L01 Serpentine
-
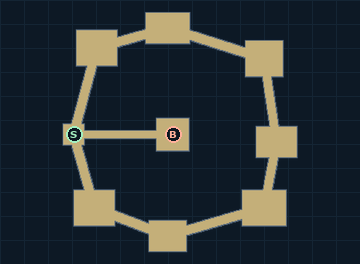
L02 Ring Road
-
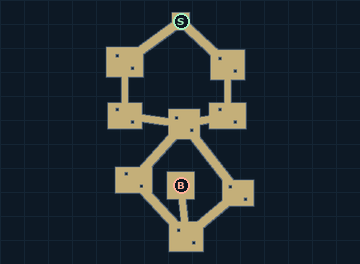
L03 Figure Eight
-
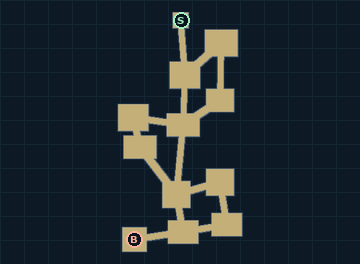
L04 Spine
-
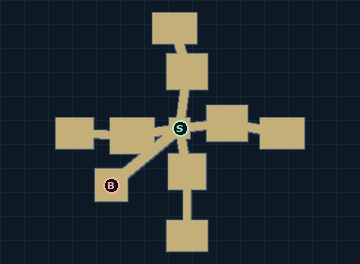
L05 Four Wings
-
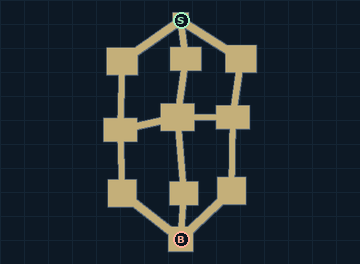
L06 Braid
-
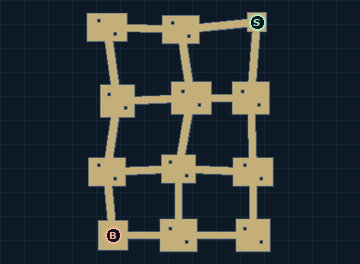
L07 City Blocks
-
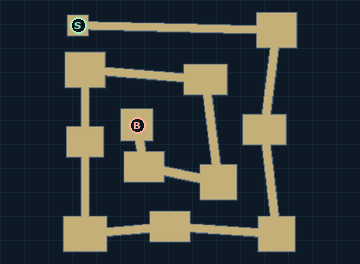
L08 Spiral
-
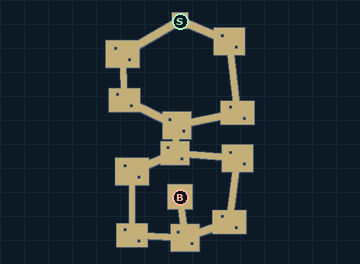
L09 Twin Courtyards
-
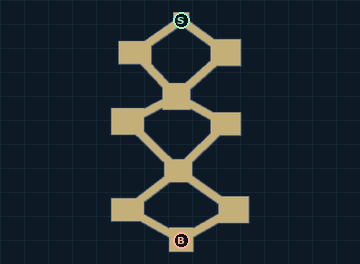
L10 Archipelago
-
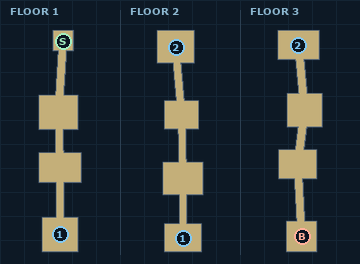
L11 Three Terraces
-
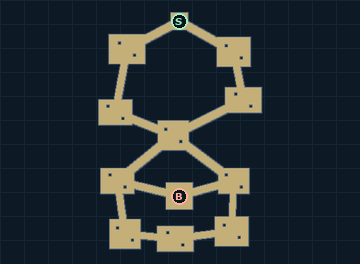
L12 Honeycomb
-
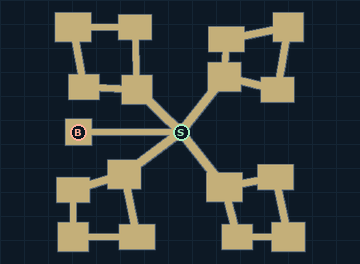
L13 Four Sectors
-
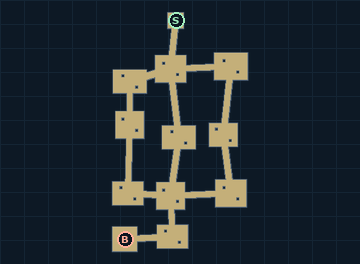
L14 Great Hall
-
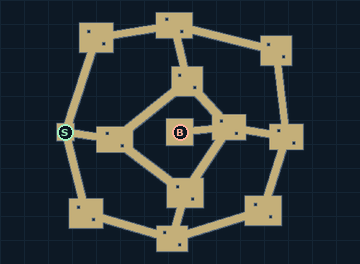
L15 Citadel


Serpentine
L01 · 1 floor — A long, winding sequence of rooms. Sweep each room before following the next bend.

Ring Road
L02 · 1 floor — A loop around the perimeter. Track which half of the ring you have cleared to avoid retracing it.

Figure Eight
L03 · 1 floor — Two linked loops. Use the central crossing as your navigation reference.

Spine
L04 · 1 floor — A central spine with branches. Clear the side rooms as you pass their entrances.

Four Wings
L05 · 1 floor — Four wings around a central junction. Pick a consistent order for the wings.

Braid
L06 · 1 floor — Interwoven lanes with repeated connections. Check junctions before committing to another lane.

City Blocks
L07 · 1 floor — A block-and-street grid. Work row by row to keep track of uncleared blocks.

Spiral
L08 · 1 floor — A spiral route. Follow the winding corridor and do not confuse adjacent sections with direct connections.

Twin Courtyards
L09 · 1 floor — Two courtyards joined by routes. Finish the branches around each courtyard.

Archipelago
L10 · 1 floor — Separate island-like rooms joined by corridors. The surrounding water is scenery, not a shortcut.

Three Terraces
L11 · 3 floors — Three floors. Matching numbered markers connect the floors: 1 links the first pair, 2 the second pair.

Honeycomb
L12 · 1 floor — A honeycomb of connected chambers. Use a consistent sweep direction at each junction.

Four Sectors
L13 · 1 floor — Four sectors with connecting passages. Clear one sector at a time.

Great Hall
L14 · 1 floor — A large central hall with connected areas. Avoid pulling several groups together across open space.

Citadel
L15 · 1 floor — A citadel of rooms and corridors. Mark cleared junctions mentally and leave the boss until your chosen clear target.

See the actual environments


Guide snapshot: 12 September 2026. Artwork uses the official client's sprites and prepared dungeon maps. Monster statistics and loot tables below are base values, before difficulty, map and character bonuses.