Zepar quest
Zepar Full Quest
Rewards
- Grand Inquisitor Gem (Quest Item)
- One of the following:
 - Inquisitor Hammer
 - Inquisitor Blade
 - Inquisitor Axe
 - Inquisitor Staff
 - Inquisitor Bow
 - Inquisitor Spellbook
- Devil Paperscroll Outfit (+160 HP, +130 MP, +1 Magic Level, +5 Skills)
Requirements
- Shovel
- Rope
- Level 130 or higher
- Ice and Fire Crystal Quests (recommended)
- Rorina Quests 1–6 (recommended, required for Spiritual Wands)
- Warlord Sword (one per player for no-boss version; one total for boss version)
- Golden Armor or Golden Legs (only for boss version of Part 6)
Location
- Demona (Carlin)
- Nivalis
Enemies
Monsters
- Bloody Mage
- Sleepy Hollow
- Prisoned Sinner
- Soul Hunter
- Inquisitor Adept
- Inquisitor Apprentice
- Inquisitor Guard
- Inquisitor Scholar
- Witch Hunter
Bosses
- Grand Inquisitor
Quest Walkthrough
Part 1 – Reaching Lord Urjuke
This step is best completed at the start of the quest line to save time later.
Travel to Nivalis and locate Lord Urjuke in the restricted area beyond NPC Nirdui (requires completion of Ice and Fire Crystal Quests).
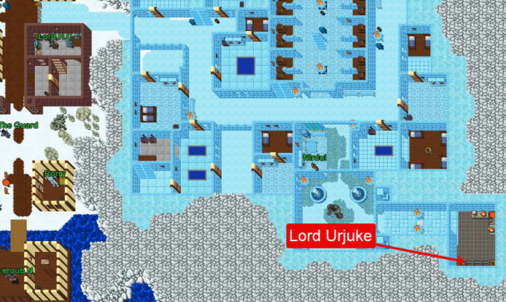
Before approaching Lord Urjuke, you must sacrifice one item from each set displayed in the reference images to unlock the path.
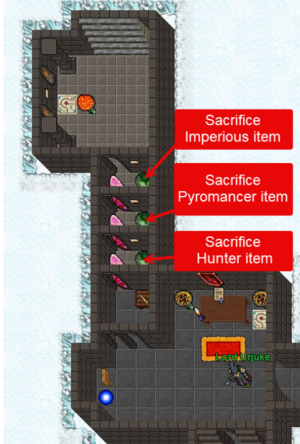
After reaching him, speak with the NPC to begin the mission.
NPC dialogue: hi mission yes
After accepting the mission, you gain permanent access to the area.
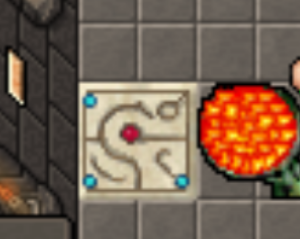
If your path is ever blocked again by crystal barriers, step onto the white tile beside the coal basin near the stairs to re-enter.
Note: Running east from Lord Urjuke leads to several teleports that provide access to strong hunting zones filled with Demon Blood monsters.
Part 2 – Acquiring the Spiritual Wands (Blue and Green)
Before proceeding to the main quest area, collect the Blue and Green Spiritual Wands.
Blue Spiritual Wand
- Guaranteed drop from the final boss in Rorina Part 6.
- Alternatively, can be earned as a reward from the Sleepy Hollows task.
Green Spiritual Wand
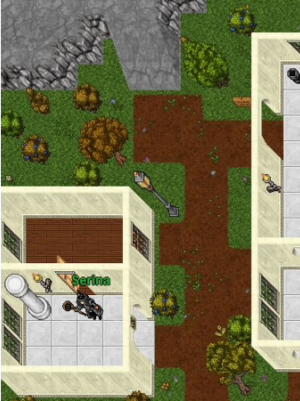
- Obtained from NPC Serina, located on Hevenia Island.
 You must have completed Rorina Part 6 before she grants the wand.
 NPC dialogue:
 hi
 baphomet soul
 yes
If Serina directs you to her sister instead, it means you reborned after completing the Rorina quests — If you completed up to Rorina 5, then re-enter the area and kill the mini-bosses and Rorina the ancient then proceed to Rorina 6 to kill baphomet.
Alternatively, the wand can also be obtained as a reward from the Bloody Mages task.
Part 3 – Entering the Quest Area
Follow the reference images to navigate to the Zepar quest entrance.
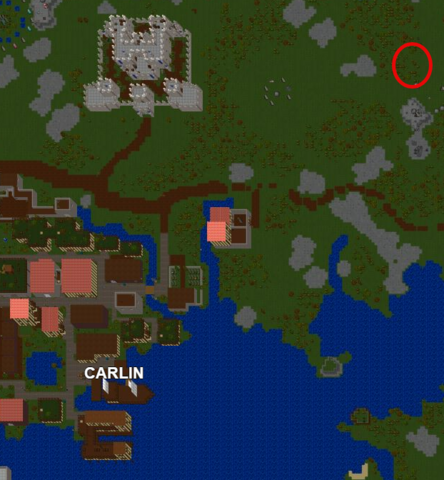
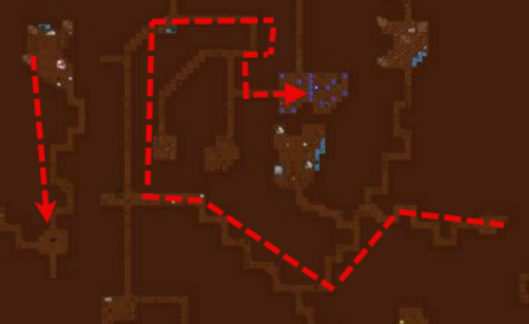

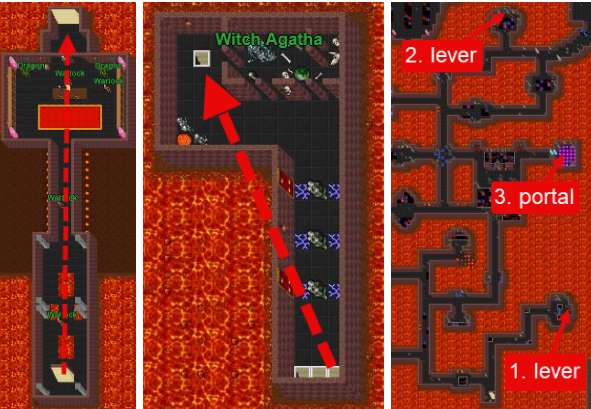
In this zone, you must locate and pull two levers to unlock the blue portal that grants access to the main quest area.
Part 4 – Path to Zepar
In this section, multiple levers must be activated to reach the NPC Zepar.
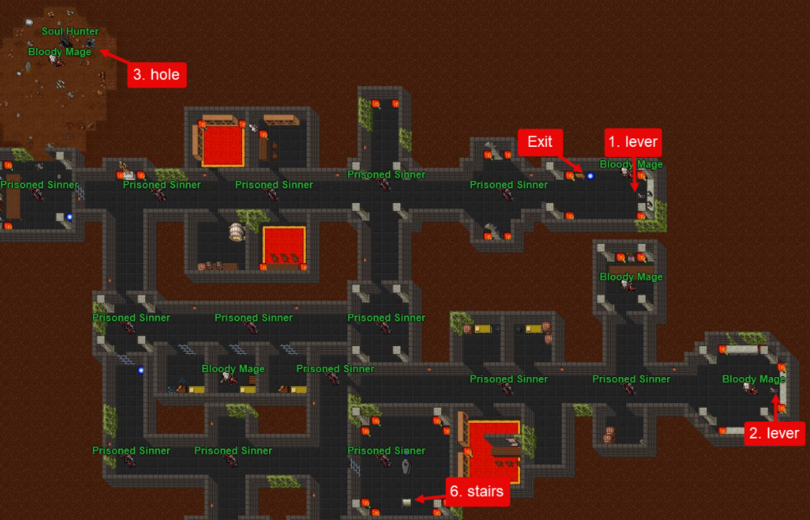
Each lever opens specific gates. If you become trapped behind a gate, use the nearby blue portal to teleport outside and reset your position.
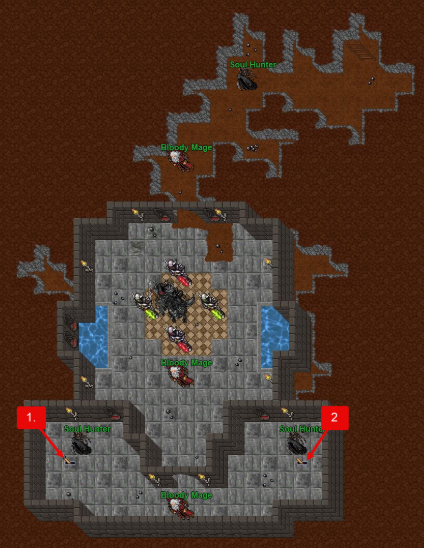
1. Pull Levers 1 and 2.
2. Proceed to the hole marked as point 3 and pull two additional levers inside.
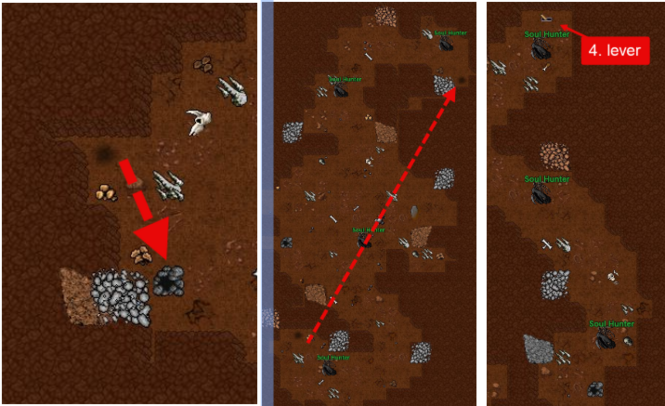
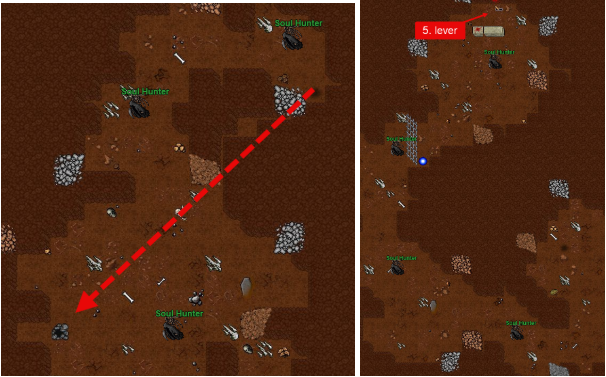
3. Return to the previous area and descend the stairs at point 6.
Continue following the reference images to locate additional levers.

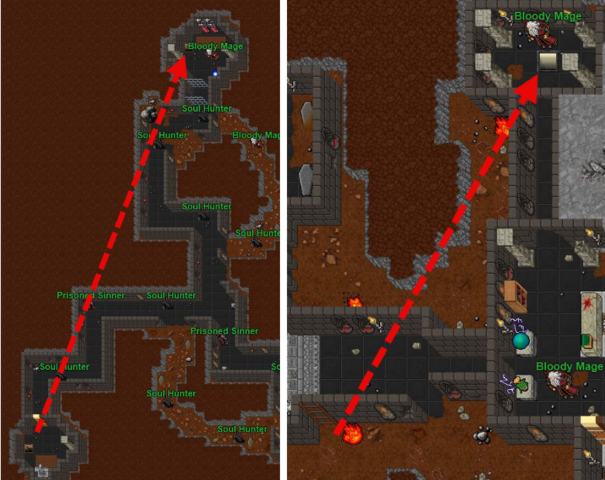
The final two levers are guarded by Prison-type monsters that will spawn upon activation — proceed cautiously.
After pulling both levers, climb back up and head north to reach the chamber containing the quest NPC Zepar.
Part 5 – Retrieving the Remaining Spiritual Wands (Red and Yellow)
Before speaking to Zepar, collect the two remaining Spiritual Wands.
Pass through the southern door of the room and descend the ladders.
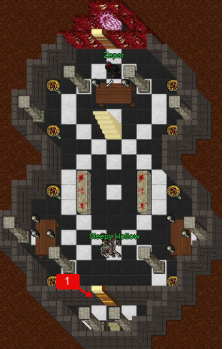
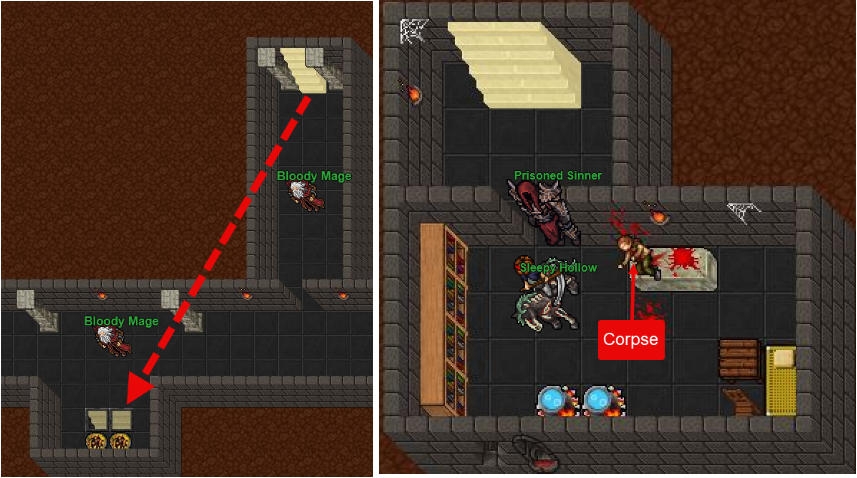
The wands are hidden within corpses scattered throughout the area — right-click each corpse to retrieve them.
Refer to the images for detailed paths to each wand.
Red Spiritual Wand – found in the eastern section.
Yellow Spiritual Wand – found deeper in the southern section.
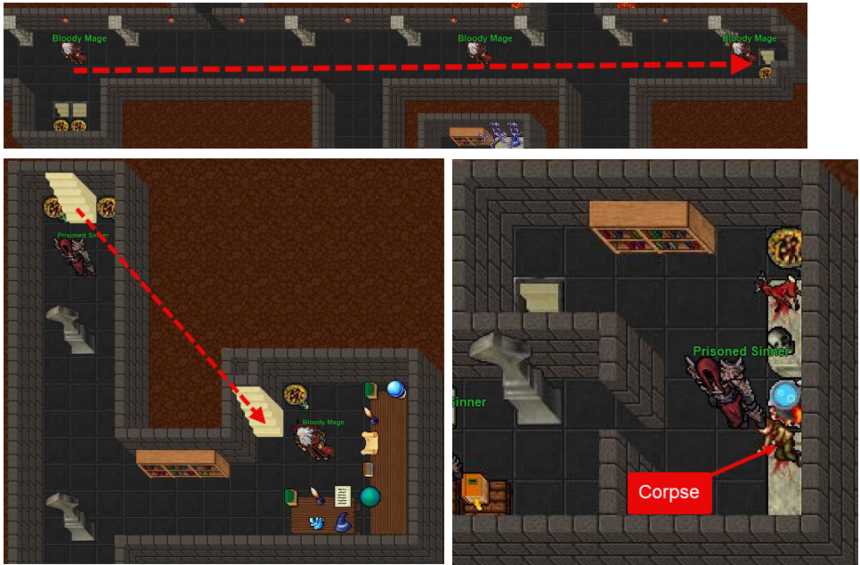
Once both wands are obtained, return to Zepar.
NPC dialogue: hi spiritual wands yes second part yes
The door north of Zepar will now open, granting access to the final area — also an excellent hunting ground for Inquisitor monsters.
Part 6 – Second Part (No-Boss Version)
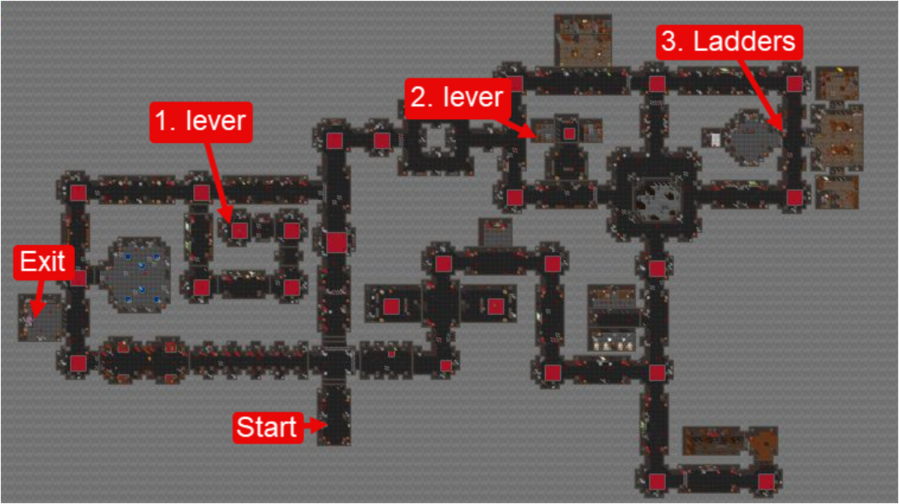
In this version, two levers are hidden around the area (some beneath crates).
Locate and pull both to open the paths forward.
After activating both levers, descend the stairs shown in the images.
At the bottom, stand beneath the stone marked with blood and place a Warlord Sword on the altar.
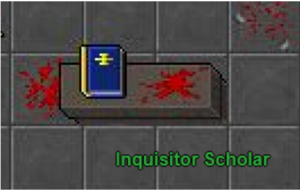
The sword will be sacrificed, and you will be teleported to the reward room.
Each player must sacrifice one Warlord Sword individually to proceed.
Part 6 – Second Part (Boss Version)
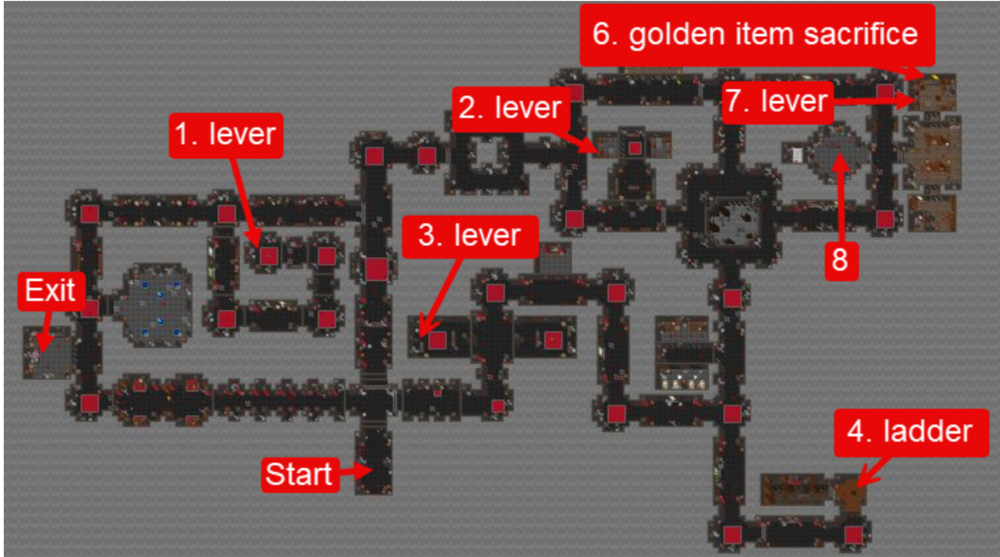
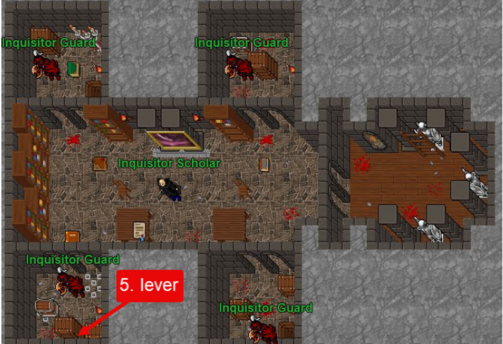
In the boss version, multiple levers (1–8) are spread throughout the area, some hidden under boxes.
Follow the numbered steps in the reference images carefully.
At Step 6, sacrifice a golden item (Golden Armor or Golden Legs) at the marked location.
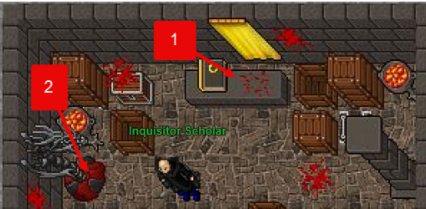
Doing so removes the dragon statue to the west, revealing a lever beneath it.
Pull this lever to open the gate to the final room.
At Step 8, place a Warlord Sword on the bloody altar.
This immediately summons the Grand Inquisitor — be prepared for battle.
Once the boss is defeated, step into the teleport that appears to reach the reward room.
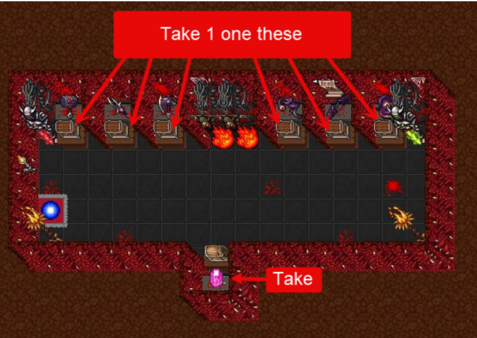
Part 7 – Final Stage
After collecting your rewards, use the teleport to return to Zepar. Speak to him to finalize the quest.
NPC dialogue: hi grand inquisitor gem yes
You will receive the Devil Paperscroll Outfit scroll in your backpack.
If you previously began the mission from Lord Urjuke, you may now also ask Zepar for the Magical Crystal.
NPC dialogue: hi magical crystal
Next, return to Lord Urjuke in Nivalis and deliver the Magical Crystal to him.
NPC dialogue: hi magical crystal
Completing this step unlocks the next storyline quest — Devil Hills Scroll.
Quest Complete
You have completed the Zepar Full Quest.
This quest rewards the Grand Inquisitor Gem and powerful Inquisitor equipment, marking a major milestone in the storyline leading to the Devil Hills series.
Tips
- Recommended to complete all Rorina quests beforehand to access all Spiritual Wands.
- Bring multiple Warlord Swords if multiple players are participating.
- Auto-loot does not collect wands — inspect corpses manually.
- Prison monsters spawn near levers; clear nearby areas before activating them.
- Golden Armor or Legs are required only for the boss version of Part 6.
- Players seeking additional rewards can farm Inquisitor monsters in the final area.
- Finishing this quest unlocks the path to the Devil Hills Scroll storyline.
